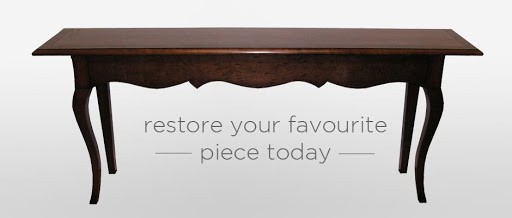
The method of repairing wooden furniture can take several different forms. Since there are so many other wooden furniture styles and decorations, there are also many repairs. Detailed below are the most common repairs to wooden furniture, such as those to seats, cabinets, drawers, caning, and mirror frames. Each form of patch necessitates a different technique. Here are a few of the furniture repair tips. Major furniture repairs often necessitate disassembling and reassembling the item. It seems clear enough to take objects apart and reassemble them. However, anybody who has attempted this knows that it never goes as planned. This article would teach you how to deal with your work’s most popular and stressful facets professionally. We’ll also show you some shortcuts that can enable you to prevent disassembly entirely. Only remember that these techniques aren’t intended for fine antiques. If you think a piece of furniture is very old or expensive, have it examined by a professional.
- Drill holes in the nails to get a grip.
Nails are simple to remove. For easy removal, you can divide the pieces before removing the nails. This will give the chance of hammering the nail straight down the section to the other side in some cases. If you can’t get your hands on the nail’s head, drill holes on opposite sides of the nail shank just big enough for needle-nose pliers. Bore as far as the shank with the bit running parallel to it. This would aid in the loosening of the nail.
- Remove fractured tenons by hollowing them out and then chipping them out.
When part of a dowel or tenon remains in its socket, you’ll be tempted to take a similar-sized bit and drill it out entirely. However, you would almost certainly end up with a widened, off-center hole. Use a bit that is around 1/8-in narrower than the socket instead. Break off a piece of the residual stuff, and the remainder could quickly chip away. The best weapon for the job is a small carver’s gouge, but a narrow chisel or even a sharpened screwdriver can help.
- Take out with a hammer.
Despite the availability of a range of spreading clamps and prying equipment, hammers remain the most used disassembly machine among furniture repair professionals. Some people use rubber mallets, while others use dead-blow hammers, including sand or metal fired in the heads to reduce bounce-back. To avoid surface damage, you’ll need a set of wooden blocks, cardboard, or carpet scraps in any case. Swing away from the workbench, which is covered with carpet or a thick rug. Attempt to separate joints in a straight line. While some bending and wrenching are unavoidable, hold it to a minimum to avoid damaging the joinery.
- Inject epoxy into any loose joints.
This is a patch that purists in furniture restoration despise, but let’s admit it: certain items aren’t worth the time and effort it takes to make a top-notch repair. Epoxy injection is quick and easy, but it’s still a bit of a risk. It doesn’t always fit because if it doesn’t, you’re left with a loose joint that’s almost difficult to disassemble and re-glue. The aim is to push epoxy into the pocket between the tenon’s end as well as the mortise or socket’s foot. Epoxy can leak through the holes around the tenon in this manner. Drill a hole in the pocket large enough for the tip of the syringe to close securely when inserted. Wiggle the loose component when applying pressure to the needle, so epoxy flows all over the tenon. Low-viscosity epoxy that is easy to inject and wash would give you the best outcomes.
- Remove adhesive tenons by heating them and scraping them off.
Since new glue does not stick well to old adhesive, you must remove it before reassembling. When you use a heat gun on old glue, it becomes soft, gummy, and easy to peel off, much like old paint. Often keep in mind that a heat gun is intended to burn finishes and can also combust wood. To keep it calm, keep a wet rag nearby.
- Remove glue from joints with shaves and hot water.
Scraping, sanding, or reaming old glue out of a plug or mortise is time-consuming and labor-intensive. It’s also difficult to accomplish without widening the gap. But why not rely on heat and moisture to do the heavy lifting? DIYers can use a large syringe to direct steaming hot water where it’s needed, and crushed block plane shavings are ideal for soaking up softened glue. You may have to restart the procedure a few times, but it’s always better than the alternatives.
- Repair a tenon that has snapped.
While a broken tenon seems to be a catastrophe, it is straightforward to repair. One perhaps has to trim the rough, split end. Then, to replace the missing tenon, glue a block in place. Since traditional glues don’t bind end grain well, use epoxy if you’re repairing a chair leg or other component that will be subjected to a lot of tension. Drill a dowel hole through the block into the section while the block is still in place.
- Recover a tenon that has been damaged.
The tenon and socket break down each other as a joint loosens and starts to wobble. Wrap a shaving from your plane around the tenon to expand it and restore a close fit. Keep in mind that wear and shrinkage will cause circular sockets and tenons to become oval.
- Add a rung or a spindle.
It is possible to remove a bent spindle or chair rung. But how do you reinstall the restored or new component without disassembling the whole system? A scarf joint is a solution: an extended, tapered cut with plenty of surface area for a good glue joint. In comparison to a straight crosscut, a scarf joint is less noticeable.