 Skip to content
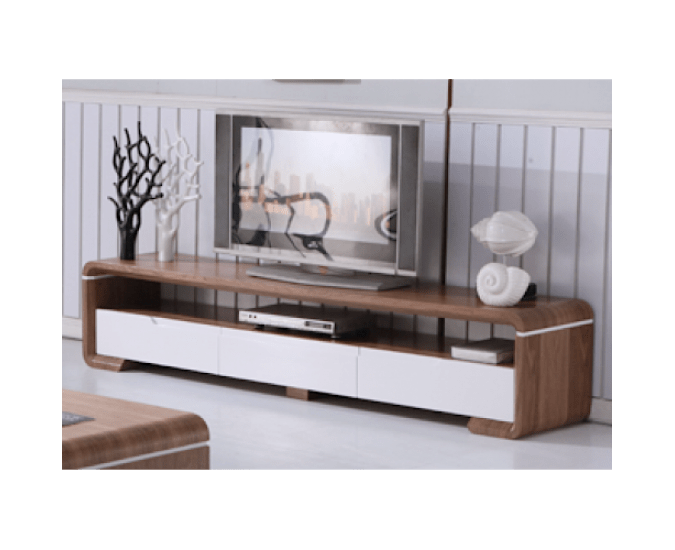
It’s not just rewarding to say, “I designed that!” when you finish a piece of furniture you made yourself. It’s also a good option if you need a specific size or design. It’s a lot easier to build a TV console than you might think, and I’ll show you how to do it down below
Step 1: Build Two Side Panels. To begin with, if you bought 2 x 2s, look for any rounded corners and make sure they face the back or inside of the cabinet. If you choose not to have rounded corners, you can buy 2 x 4 studs and rip them down to 112 in. widths with a table saw. Cut four 2 x 2 legs using them and cut off your 16-inch-long frame bits after that (you will use four now and two in step 2). Drill 12 in. pocket holes into both ends of each frame section with a drill and a pocket hole jig (not the legs). Rip a piece of 16 in. thick 34 in. plywood off your full sheet using a Rip-Cut and a circular saw. Accordingly, cut this into three parts: one 48-inch-long piece and two 212-inch-long pieces. Drill 34-inch pocket holes along the interior margins of the narrow plywood panels with a pocket hole jig and a drill. Use 212 in. pocket hole screws on the 2 x 2s and 114 in. pocket hole screws on the plywood holes to assemble these panels and the frame parts. Your cabinet sides are now complete.
Step 2: Build the cabinet frame. Once you completed the sides in phase one, it’s time to move to the next stage. Break the 48 in half and drill 12 in. in to the frame bits. All ends of each piece should have pocket holes.
Drill 34 inches as well. For 48 inches, use the 2 1/2 inches long plywood panel from phase 1 to assemble the rest of the frame as seen. 2 x 2s and 14 in. pocket hole screws on the plywood openings. Ensure that the bottom 2 x 2s and the side panel 2 x 2s are aligned. Often, make sure the plywood top is level with the tops of the 2 x 2s or near to it.
Add 16 inches to complete the case. Use 112 in. to make long 2 x 2s (leftover from Step 1). 212 in. of pocket holes screw in the pocket slot. Make sure the entrance from the exterior is 14 inches long and square.
Step 3: Add Dividers and Bottoms to the TV Cabinets. Using a jigsaw, carefully cut out the upper front and back corners. They ought to be flush with the top of the cabinet. It’s best to start small and work your way up. You can still take more off, but if you cut too many off, you won’t be able to bring it on! Dry fit it first before attaching it. Drill pocket holes in the top and bottom edges of these two divider bits, and apply edge banding to the front edges. For a smoother appearance, this would mask the plywood corners. With a standard iron, the pre-glued form is simple to add. To shield the iron from glue, I propose wrapping it in tin foil.
Using 114 in. of plywood and bottom 2 x 2 braces, attach dividers. Screw-in the pocket slot before screwing them together. Check if they are square. Apply edge banding to the front edge of the cabinet bottoms as directed on the cut list—drill pocket holes on both sides of each section and use pocket hole screws to join them together. Attach them to the rear of the cabinet so that they are flush with the back.
Step 4: Make a 16 inch, 5/8-inch ball bearing cabinet slides wood screws to line up your drawer slide. Put a spacer across the bottom 2 x 2s of the frame. Please make sure they’re 34 inches from the front so that later-added drawer fronts can be in the set. It’s time to start constructing your drawers. Measure before making any required corrections. The total width of the drawers should be one inch. If you have a router or table saw, you can cut a dado about 12 in. narrower than the drawer opening to slide the drawer bottom. Please don’t have these tools; you should solder on the bottom instead. Then, depending on your preference, assemble using glue and brad nails or wood screws.
If you cut dados, make sure to cut your bottom and slip it in place before adding the fourth box line. Using a 14-inch cutter, make 14-inch cut plywood to match however deep your dados can cut. Cut a sheet of plywood the size of your box, glue, and nail (or screw) it to the bottom if you didn’t use dados. Place these drawers in their proper locations. Cut 1 x 2s to match along the sides of the drawer and glue or lock them in place. Leave about an eighth of an inch. There will be a difference in both directions.
Step 5: Attach the backing. At this point, staining and painting is the most straightforward choice. Cut your backing piece accordingly and nail or staple it in place once you’ve done this section. The cabinet has to be covered, not the drawers.
Step 6: Make the necessary changes to the door parts based on the cabinet door openings. Cut these door pieces into frame pieces and solder them together. Check to see how the door sizes would match in the gaps. Once the adhesive has dried, use a router and a rabbet bit to cut the interior door opening for the glass to match. You don’t have to do that part if you don’t have a router or don’t want to; it just makes it cleaner. Glass for these doors may be ordered separately. If you’re going to carve a rabbet groove, make sure the glass you use can match inside. Otherwise, make sure it’s big enough to fill the inside hole plus an inch. It’s best to polish and paint the wood before adding the glass. Place the glass panel in place with transparent Gorilla Glue around the groove or hole. Place something hard on top to keep it in place until it dries. Carry out the same procedure for the remaining three doors. You can cut to match parts to make a paneled look and glue these on top of the glass as an extra move until the glue is dried. Once the glue has dried, attach the doors in place with small cabinet butt hinges.
Step 7: Complete the project. Attach a clear waterproof coat like poly or wax on any areas you haven’t yet stained or painted. To keep the doors in place, use hardware on the doors and drawers, as well as magnetic catches.
You can then step back to enjoy your new TV console after you’ve installed all of your hardware.
