Best HVAC Companies in Phoenix, Arizona, USA

The phoenix is a bird associated with Greek mythology that born again and again. Associated with the sun, a phoenix obtains new life by arising from the ashes of its predecessor. Name after this bird is, the name of the city in Arizona, USA. Phoenix is the capital of the southwestern U.S. state of Arizona. Known for its sun and hot temperatures, the area is also known as the Valley of the Sun. Due to its sunny and hot weather, to live comfortably inside the house, you will need a Air Conditioner or HVAC system installed in your home to supply cold or heat air to your house. In winters it wont be very hot but the temperatures are uncomfortable. But summers are really hot and humid, leaves you sweaty and stuffy. There are many good number of HVAC or Air Conditioner contractors in the state of Phoenix, Arizona. You can contact any of the HVAC or Air Conditioner contractors in your area, who can make your house comfortable with great quality and affordable price.I am listing down some of the queries you might have regarding HVAC systems in general. How much does it cost to replace an entire HVAC system? The cost really depends on the below criteria How big is your house How big are the rooms in your house to asses the capacity of the blowers you need. What type of system you go for centralized or split Air conditioner What type of energy efficient system you looking for. Better energy efficient system reduce electricity consumption , but upfront it will be expensive Roughly it will cost some where between $12,000 to $35,000 How much does a new AC unit cost in AZ? It really depends on the size and capacity of the AC you looking for. It might cost some where between $1,500 to $3,000 Is a new HVAC system worth it? If your existing HVAC is old and frequently need to engage HVAC service engineer to fix the issues, it is definitely worth buying a new HVAC system for your home. The new HVAC system might be a bit expensive but there are many long term benefits such as cleaner air, good temperatures, no repairing expenses and reduced costs due to new energy efficient systems. How do you know when to replace HVAC? If the HVAC system is old and lot of issues are occurring too frequently, it is time to change your HVAC system. What size AC unit do I need for a 2000 square foot house? If only AC need to be added and the existing ducts can be reused, it will be some where between $2,000 to $3,000. If ducts need to be added then there will an additional ducting work charges. How many sq ft will a 2.5 ton AC cool? The area a 2.5 ton AC will be able to cool comfortably is 1000 – 1200 sq ft. If you are looking for 1200 to 1500 sq ft, you can go for a 3 ton AC What SEER rating should I buy? The minimum SEER rating for air conditioner is 13. The higher the SEER rating, the more is the energy efficient the AC is. The ranges in the market ranges form 13 to 22 for air conditioners. Is 16 SEER worth the money? 16 SEER rating AC is very much energy efficient and can save hundreds of dollars every year. It is noted that 16 SEER rating is 11-14% more efficient. How long do central AC units last? AC units last very long. They life of unit will be 15 to 20 years How much should a 5 ton AC unit cost installed? 5 ton AC will cost around $3,500 to $4,000 Can you replace just the outside AC unit? Yes, The outside compressor can be changes and reuse back the existing ducts and blower units. I am providing the list of top 10 HVAC or Air Conditioner contractors who can make your house comfortable with great quality and affordable price. Steve’s Ultimate Air Heating & Cooling Services (480) 458-7287 Mason Pro Services (602) 562-2171 962 E Isabella Ave Mesa, AZ 85204 AirZona HVAC 295-1911 6094 N 57th Ave Glendale, AZ 85301 Gladiate Air Conditioning & Heating (623) 249-4536 Scottsdale Air Heating & Cooling 485-2521 4713 N 44th St Phoenix, AZ 85018 Larson Air Conditioning (480) 428-0600 15475 N Greenway-Hayden Lp Ste B11 Scottsdale, AZ 85260 Sure Temp Air Conditioning 346-9607 7931 E Pecos Rd Mesa, AZ 85212 Boldt HVAC & Repair (623) 340-1881 4302 W County Gables Dr Glendale, AZ 85306 Schiller Heating & Cooling (480) 648-0846 206 W Julie Dr Ste 1 Tempe, AZ 85283 Savage Air Conditioning (480) 839-7553 6900 S Priest Dr Ste 9 Tempe, AZ 85283 You can reach out to any of the above to get your HVAC or Air Conditioner installed, repaired or serviced in Arizona. It is very important to keep your HVAC or Air Conditioner to be well serviced to avoid excessive electricity consumption and keep your cold/hot air in control. All the above HVAC companies have very good online reviews. They service all kinds of HAVAC systems. It includes the central air conditioning units and support brand like Carrier, Lennox, Trane, Daikin, Johnson Controls e.t.c. The above list of HVAC and Air Conditioner support HVAC services I the below Arizona Counties. Apache County Cochise County Coconino County Gila County Graham County Greenlee County La Paz County Maricopa County Mohave County Navajo County Pima County Pinal County Santa Cruz County Yavapai County Yuma County
10 Best Air Conditioner Contractors in Metro Manila, PH

“Manila” is commonly referred to the greater metropolitan area or the city. Metro Manila is the city where large part of city population are residing and also is the capital of Philippines. It is the most populous region in the country, one of the most densely populated urban areas and is one of the and house to many wealthy people in the regions in Southeast Asia. Metro Manila is very hot and humid and ranges between 28 to 35 degrees centigrade. Only escape from the hot sun for Manila Metro citizens is to safely in the home with their air condition switched on. Most of the apartments are fixed with centralized or split aircons in their homes. In case there is any problem with the air conditioner, the family need to engage the AC servicing company as soon as possible to avoid the uncomfortable stuffy nights. The families with small children will suffer from the heat and couldn’t sleep during the night. To avoid these type of issues, it is always better to engage the Air conditioner servicing company to service your aircon on a quarterly basis. We are providing a list of best 10 Aircon Contractors in Metro Manila. These companies have a credible online reputation for quality service with affordable pricing. Phil-Air & Frigid Air Address: Osmena Highway corner Fahrenheit Street Brgy, Makati, 1235 Metro Manila, Philippines Phone: +63 2 8833 6173 Top Premiere Enterprise Refrigeration And Air-Conditioning Services Address: 1918 Piy Margal St Sampaloc, 504, Manila, 1008 Metro Manila, Philippines Phone: +63 2 8254 2440 Paranaque Aircon cleaning aircon repair installation freon charging Phone: +63 948 993 1737 Aircon Cleaning Home Service Repair Address: 5523 P. Binay St, Makati, Metro Manila, Philippines Phone: +63 920 353 3668 Daikin Airconditioning Philippines, Inc. Address: Sunnymede IT Center, 1614 Panay Ave, Diliman, Quezon City, 1100 Metro Manila, Philippines Phone: +63 2 8352 4819 kolcare Refrigeration and Air conditioning Company Address: 24-E Nicanor Roxas St, Quezon City, 1114 Metro Manila, Philippines Phone: +63 2 8522 1599 MRV Refrigeration & Airconditioning Parts & Supplies Address: 76, 1114 Bulusan, La Loma, Quezon City, Metro Manila, Philippines Phone: +63 2 8740 1224 Wise Man Aircon Cleaning Services Address: 4, Del Pan Street, Sta Ana, Manila, 1009 Metro Manila, Philippines Phone: +63 2 8562 7097 Brun Aircondition & Refrigeration Sales & Services, Inc Address: 186 Iba, La Loma, Lungsod Quezon, Kalakhang Maynila, Philippines Phone: +63 2 8516 2490 Mr. Aircon Philippines Address: 384 Marikina-Infanta Hwy, Marikina, 1800 Rizal, Philippines Phone: +63 2 8477 1111 You can reach out to any of the above to get your Air Conditioner installed, repaired or serviced. It is very important to keep your Air Conditioner to be well serviced to avoid excessive electricity consumption and keep your cold/hot air in control. All the above HVAC companies have very good online reviews. They service all kinds of HAVAC systems. It includes the central air conditioning units and support brand like Carrier, LG, Samsung, Sharp, HItachi, Daikin, Panasonic, Kolin e.t.c.
Best HVAC or Air Conditioner contractors in Texas, United States

Texas is a state in the South Central region of the United States. It is the second largest U.S. state by both area and population. Texas shares borders with the states of Louisiana to the east, Arkansas to the northeast, Oklahoma to the north, New Mexico to the west, and the Mexican border and has a coastline with the Gulf of Mexico to the southeast. Winters in Texas is mild and colder and summers are hot and humid. To live comfortably inside the house, you will need a Air Conditioner or HVAC system installed in your home to supply cold or heat air to your house. In winters thee wont be any snow, but they are rare occurrence. But summers are really hot and humid, leaves you sweaty and stuffy. There are many good number of HVAC or Air Conditioner contractors in the state of Texas. I am providing the list of top 10 HVAC or Air Conditioner contractors who can make your house comfortable with great quality and affordable price. Metro Air Conditioning Phone: +1 214-390-3740 Texas Air Conditioning Address: 807 W Price Rd, Brownsville, TX 78520, United States Phone: +1 956-525-6060 Reliable Air Address: 4702 TX-123 #C, San Marcos, TX 78666, United States Phone: +1 512-396-8183 Texas Made Air Conditioning and Heating Address: 1314 Weatherford Hwy, Granbury, TX 76048, United States Phone: +1 817-270-9239 Air Texas A/C & Heating Address: 2707 Trinity Ridge, San Antonio, TX 78261, United States Phone: +1 210-602-7181 Airtron Heating & Air Conditioning Phone: +1 210-693-0891 ETR East Texas Refrigeration Air Conditioning & Heating Address: 5159 W Loop 281, Longview, TX 75603, United States Phone: +1 903-720-0048 Airview AC Address: 277 N Waco St, Van Alstyne, TX 75495, United States Phone: +1 972-914-7452 Vanderford Air and Plumbing Phone: +1 281-344-2925 Texas Discount Air Address: 5157 Senator Dr, Keller, TX 76244, United States Phone: +1 682-214-4822 You can reach out to any of the above to get your HVAC or Air Conditioner installed, repaired or serviced. It is very important to keep your HVAC or Air Conditioner to be well serviced to avoid excessive electricity consumption and keep your cold/hot air in control. All the above HVAC companies have very good online reviews. They service all kinds of HAVAC systems. It includes the central air conditioning units and support brand like Carrier, Lennox, Trane, Daikin, Johnson Controls e.t.c. The above list of HVAC and Air Conditioner support HVAC services I the below Texas Countys. 1 Anderson County 2 Angelina County 3 Aransas County 4 Archer County 5 Armstrong County 6 Atascosa County 7 Austin County 8 Bailey County 9 Bandera County 10 Bastrop County 11 Baylor County 12 Bee County 13 Bell County 14 Bexar County 15 Blanco County 16 Borden County 17 Bosque County 18 Bowie County 19 Brazoria County 20 Brazos County 21 Brewster County 22 Briscoe County 23 Brooks County 24 Brown County 25 Burleson County 26 Burnet County 27 Caldwell County 28 Calhoun County 29 Callahan County 30 Cameron County 31 Camp County 32 Carson County 33 Cass County 34 Castro County 35 Chambers County 36 Cherokee County 37 Childress County 38 Clay County 39 Cochran County 40 Coke County 41 Coleman County 42 Collin County 43 Collingsworth County 44 Colorado County 45 Comal County 46 Comanche County 47 Concho County 48 Cooke County 49 Coryell County 50 Cottle County 51 Crane County 52 Crockett County 53 Crosby County 54 Culberson County 55 Dallam County 56 Dallas County 57 Dawson County 58 Deaf Smith County 59 Delta County 60 Denton County 61 DeWitt County 62 Dickens County 63 Dimmit County 64 Donley County 65 Duval County 66 Eastland County 67 Ector County 68 Edwards County 69 El Paso County 70 Ellis County 71 Erath County 72 Falls County 73 Fannin County 74 Fayette County 75 Fisher County 76 Floyd County 77 Foard County 78 Fort Bend County 79 Franklin County 80 Freestone County 81 Frio County 82 Gaines County 83 Galveston County 84 Garza County 85 Gillespie County 86 Glasscock County 87 Goliad County 88 Gonzales County 89 Gray County 90 Grayson County 91 Gregg County 92 Grimes County 93 Guadalupe County 94 Hale County 95 Hall County 96 Hamilton County 97 Hansford County 98 Hardeman County 99 Hardin County 100 Harris County 101 Harrison County 102 Hartley County 103 Haskell County 104 Hays County 105 Hemphill County 106 Henderson County 107 Hidalgo County 108 Hill County 109 Hockley County 110 Hood County 111 Hopkins County 112 Houston County 113 Howard County 114 Hudspeth County 115 Hunt County 116 Hutchinson County 117 Irion County 118 Jack County 119 Jackson County 120 Jasper County 121 Jeff Davis County 122 Jefferson County 123 Jim Hogg County 124 Jim Wells County 125 Johnson County 126 Jones County 127 Karnes County 128 Kaufman County 129 Kendall County 130 Kenedy County 131 Kent County 132 Kerr County 133 Kimble County 134 King County 135 Kinney County and Upton County 136 Kleberg County 137 Knox County 138 La Salle County 139 Lamar County 140 Lamb County 141 Lampasas County 142 Lavaca County 143 Lee County 144 Leon County 145 Liberty County 146 Limestone County 147 Lipscomb County 148 Live Oak County 149 Llano County 150 Loving County 151 Lubbock County 152 Lynn County 153 Madison County 154 Marion County 155 Martin County 156 Mason County 157 Matagorda County 158 Maverick County 159 McCulloch County 160 McLennan County 161 McMullen County 162 Medina County 163 Menard County 164 Midland County 165 Milam County 166 Mills County 167 Mitchell County 168 Montague County 169 Montgomery County 170 Moore County 171 Morris County 172 Motley County 173 Nacogdoches County 174 Navarro County 175 Newton County 176 Nolan County 177 Nueces County 178 Ochiltree County 179 Oldham County 180 Orange County 181 Palo Pinto County 182 Panola County 183 Parker County 184 Parmer County 185 Pecos County 186 Polk County 187 Potter County 188 Presidio County 189 Rains County 190 Randall County 191 Reagan County 192 Real County 193 Red River County 194
10 Best Final year projects for Computer Science Students Which Has Real World Use Case

In India, final year of BE/B Tech/MCA/BCA, students need to develop and submit a project in the relevant course. Typically there are two ways to do the project in the final year of BE/B Tech/MCA/BCA. One, you try to develop some new tool and secondly create an application using different tools available in market which has a relevance and can be used in industry. The objective of the final year project is to narrow the theoretical knowledge you gain fin first 3 years and real time application developed outside to solve a specific problem. Main purpose for you gain in depth knowledge in the technologies used in the project and also how it is applied in real world. But sadly, lot of students choose to develop new tools which is not only hard but also have limited application. I am going to provide a list of projects you can do using existing tools, but with a real world problem solving use case. Below are some of the best and easy topics you can choose for your BE or B Tech or MCA or BCA Final year project or Mid year project. The list is based on practical experience, widely used in industry and need only 3-4 months of your time. The final year project or mid year project needs to be closer to the industry application than just fancy to tell friends and family. Cryptography Web Services Predictive Analytics Data Analysis Dashboard Real Time Notification using APIs Data Recovery Tools WhatsApp Integration Digital Wallet creation Cross border funds transfer using crypto currencies Digital Marketing Tools 1. Cryptography Cryptography is a field of study where applications are developed to protect digital information, so that only the intended recipients can view and use the content. Nowadays data protection is almost mandatory in all the countries. The application for cryptography is every where in industry. Corporate and banks use cryptography to secure there data, so that no hacker get hold of sensitive customer data. As part of final year project you can do a application to transfer data securely between two systems or two companies. 2. Web Services Web Service is a service offered from one system to another system for a specific action. It can be updating records or requesting information. Web service can be developed in any language and hosted and accessed via internet. Fir example, google can develop a web service to return search results. You call the API and send the search keywords, google will return the web page results to your system. This is just one example of many. We everyday use Web Services in our daily life. 3. Predictive Analytics Predictive Analytics is prediction some outcome based on the historical data. Example will be loan department predicting if the loan seeker will be able to repay or not based on the data they have which matches loan seeker profile. Predictive analytics is widely used in banks, e-commerce companies, big corporate’s and internet companies. You can gather data from online databases available in internet. Develop a model based on this. The application can be predicting behaviour to grant loan, send a marketing email, selling a offer to buy certain product etc. You can use SAS, R, Python or any other data analysis software to develop this project. This will be a very nice project for final year submission. 4. Data Analysis Dashboard There are many tools available in market to perform data analysis. Some popular software’s like Business objects, micro strategy, Qlikview etc. You can collect some organization data and build some interesting and visually interactive reports. The reports can have drill down and drill through capabilities. This might land you a job as soon as you are out of college. Simple SQL or simple tool specific knowledge is enough to generate these reports. 5. Real Time Notifications using APIs In the new world of smart phones, consumers are expecting real time updates from their banks, vendors, collages, schools and e-commerce purchases. You can develop a solution for shop keepers to accept payments using QR and receive instant notifications. These are very much relevant and vogue in current generation of receiving instant updates. QR based payments are quite popular and easy to implement. 6. Data Recovery Tools It is common problem we face that our IOS or Andriod based phones stopped working and the precious data need to be recovered. Same issues with the laptops and hard disk drives. People store all their memorable photos and videos in these drives. But overtime the disks stop working and the latest laptops or desktops stop recognizing old disks. Only way yo recover the lost data is by using a commercial available data recovery tool in market. There is a huge demand for data recovery tools in market. You can try to build a application to retrieve the data from corrupted hard disk drive. This project will be very relevant and power full for your CV. This project will give your interviewer a very good first impression on your technical and domain knowledge. 7. WhatsAPP Integration WhatsApp is widely used for personal and business use. Currently the features available in WhatApp mobile and desktop versions are very limited. For example freshchat has developed a WhatsApp integration tool, where multiple agents can access the same WhatsApp account. This will be very help full for the businesses where multiple agents are deployed to provide customer service for the same WhatsApp account. You can easily implement some of these tools by integrating with WhatsApp. More and more business looking for cheaper and better solutions to integrate WhatsApp to other tools for customer engagement and marketing purposes. 8. Digital Wallet Creation You might have heard or already using Wallets in your smart phone. Digital Wallet is a virtual account to store your funds , make payments and track your transactions. Currently many digital Wallets are in use and provide greater value to consumers. You can easily develop a digital wallet with minimum features of storing funds, make payments via payment
6 Best Wood Types For Outdoor Furniture
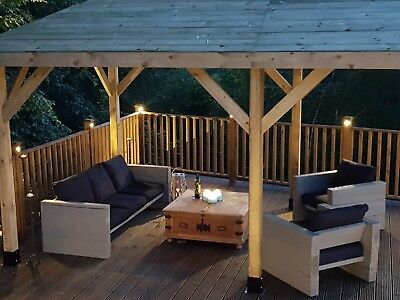
You would typically look at all of the features of indoor tables, sofas, and chairs – endurance, comfort, and design – when assessing the outdoor furniture (and, of course, price). However, the primary distinction is that patio furnishings must be exposed to the outside temperature. At the same time, almost 100 percent of the patio furniture is not weatherproof, with major variations depending on the fabrics. Furniture frames and tabletops outdoor materials Wood For thousands of years, wood was a common raw material for furniture. It is regular, simple to deal with, and offers a robust structure for tables, desks, benches, and other furniture. However, when it comes to outdoor use, not all trees are made together. Many softwoods like oak, cedar, and fir handled with pressure are economical and commonly employed in indoor furnishings but are not well supported by the elements. On the other side, hardwoods are much heavier, weather-resistant, and can be handled well for decades to come. They are often more challenging to shape and typically more costly than softwoods. On the downside, they are. But between hardwoods, too, there are significant variations. Teak Teak is the most common outdoor furniture wood option. Its demand for fine seed hardwood has increased incredibly high, along with its low supply. Their price has been very high. Fortunately, teak has several features that make it suitable for outdoor use. It is incredibly sturdy and is not warping, cracking, or breaking like many wood species. Teak repels much of the water in drying processes and does not stretch or contract. It has a high level of natural oil, which is very resistant to rot, decay, or insect damage. The longevity of teak is the longest possible – up to fifty years – against the weather. It has a beautiful brown honey look with minimal oil, or if left untreated, it will paddle into an elegant silver-gray over time. At least a few bits of this beautiful wood are manufactured for several patio furniture brands. Scandinavian designers such as Skagerak and Skargaarden use the charm of teaks to design graceful, imaginative sets of outdoor lounges and furnishings. The soap and the bath can be washed and reasonably easy to clean. PROS – Solid, durable, weather-resistant, deterioration and insects, no cracking or warping. CONs – High cost Shorea South-West Asian reddish-golden content is one of the few thicker and heavier hardwoods than teaks. Heat exposure increases its resilience (rupture mode) and stability (elasticity mode). The harvest of shorea (a.k.a. meranti) and many other hardwoods for outdoor furniture is strictly supervised to ensure its sustainability. It is also high in oil, protecting it from insects and minimizing rot and weather damage. Like teak, shorea becomes a silver-gray patina when it is not regularly oiled and lasts for up to 50 years. It’s a lot lower price, though. The only significant disadvantage to Shorea is that few stores market it due to a lack of general awareness. PROS – Robust, pest resistant, environmentally sustainable, and affordable compared to teak CONS – Limited availability of products Eucalyptus The solid, fast-growing, long-lasting Australian hardwood offers a substantial price saving compared to teak. Its natural washed look has a rustic charm, and unless it is constantly oiled, and it transforms into a silver patina. It is immune to the weather and the red and is an insecticide in its liquid. However, a sticker is advised to increase eucalyptus resistance to pests and reduce the harmful effects of unequal moisture retention. PROS – Durable, insect-resistant, environmentally safe, and cost-effective, sustainable development CONS – Subjective and prone to cracking if untreated with a dental agent for marine and pinhole borers Ipe Unlike many of their hardwood equivalents, Ipe Central and South American ipe (A.K.a. ironwood) have a deep colorful grain which, subjected to weathering, fades slower [Jankowska, Reder, Gołofit 2017]. It has a high content of natural oil that makes it survive insects, decomposing and fungal forms. Its tough, thick construction reinforces such denture, warping, and cracking against physical injury. Since it will last for up to 40 years, ipe needs a lot of planning if cut together and glued. PROS – Sustainable, solid and pest and fungal-resistant CONS – White Oak’s hard to deal with White Oak This is a wood that is stronger, tougher, and lasting for decades. Thanks to the structural ability to repel water, it is often used for resisting redness in the building of vessels for a long time. It does not have much natural oil, though, and requires paint or a screen for its longevity. Over time an elegant gray patina is developed by untreated white oak. PROS – Water tolerant, red resistant, and robust. CONS – Low quality of the oil Many of the good characteristics of teak at a much cheaper price point are shared by other hardwoods. They have disadvantages compared to the abovementioned hardwoods, though. Black, reddish acacia is available easily but is more likely to be split or cracked than shorea or eucalyptus. Roble is rare, small, and takes up half the length of teak, while African iroko can quickly be used to split woodwork tools and blunt them. Mahogany has a lovely reddish tint but is rough and can not accommodate red or teak, and takes a lot of services.
8 Steps To Hang a Shelf Using Wall Anchors
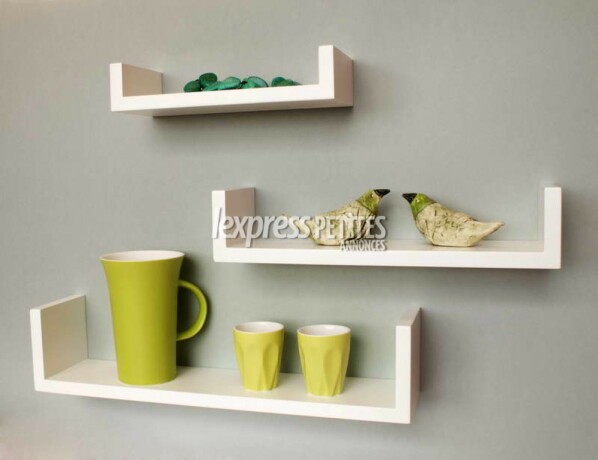
Rather than filling empty wall space with uninteresting artwork, several wall shelf units are available that are both decorative and functional. The combination of a shelf, coat rack, and photo frame is an example of one thing to give you an exciting wall space. The most challenging aspect of hanging such a shelving device is precisely positioning the hanger screws. Most commercial shelving systems have pre-installed hanger brackets on the back of the door, but some model uses keyhole brackets. These are made so the support screw can slip the shelving device, push into the wall, and then be locked in place by allowing the shelf to fall back over the heads of the screws. The shelving machine would not work correctly unless the wall screws are perfectly fitted. Since wooden shelving units can be hefty, particularly if they’re wide and long, they must be well-supported. Driving support screws directly into wall studs is the most reliable process. The studs are usually spaced 16 inches apart in the middle of most framing projects. If the hanger brackets on your shelving device are spaced 16, 32, or 48 inches apart, you will be able to insert the support screws directly through the studs. However, this would not be necessary for some instances, and you will instead need to install the support screws in the stud cavities. The steps below illustrate ways to hang a decorative wall shelf using a wall anchor. Step 1: Select a Shelf Location To begin, you’ll need to hang the shelf on the wall. The shelf and coat hooks on a device like the one we’re building should be at a height that’s easy to access. Image frames are usually placed at or above eye level. If you eyeball the shelf’s spot, enlist the assistance of a friend to keep it against the wall. To guarantee that the shelf is perfectly square, use a carpenter’s level. When you’re happy with the placement, gently trace the top and sides of the shelf unit on the wall with a pencil. Step 2: Make a Line of Reference Measure the gap between the end of the shelf and the top of the porthole opening on the hanger bracket by turning the shelving unit back-side up. This distance can be approximately 2 inches. Measure down from the shelf outline and designate a point on the wall that corresponds to this size. Create a second horizontal line segment through the wall from this point with a carpenter’s level. This line should extend parallel to the shelf outline and around the shelf from one side outline to another. This will serve as a guideline for drilling and installing wall anchors and support screws. Step 3: Measure and mark the wall. The First Wall Anchor Location is measured and marked. Measure the distance between the hanger bracket keyhole slots and the side of the shelving unit on the back of the shelf. Measure to the middle of the space with great accuracy. This distance can be approximately 1 7/8 inches in our case. Measure in from the side and outline a distance precisely equal to this measurement, then make a note on the wall anchor reference line you just traced on the wall. The first wall anchor can be placed precisely there. The shelf back has a keyhole hanger and should be perfectly aligned with it. Step 4: Getting up to drill a hole in the wall Ensure you measure the distance between hanger brackets. Also, make sure that the anchor for the second hanger bracket is perfectly spaced with the first anchor in this process, which is perhaps the most important. Take an accurate measurement from the middle of each keyhole slot on the back of the shelving device between the hanger brackets. This can be approximately 23 3/16 inches. Step 5: Shelf mounting hole measurement Make a note of the position of the second wall anchor. Measure from the first wall anchor position to the second wall anchor location on the comparison side, making sure the distance between the marks precisely suits the measurement you just made between the keyhole brackets on the shelf unit. Step 6: Creating a mounting hole in a wall Ensure that the wall anchor is in good working order by putting it through its paces. An expandable metal hollow-wall anchor, widely known as a Molly bolt, is the best choice for this use. Some hollow-wall anchors have sharp tips that can quickly be hammered through drywall, but to prevent wall damage, we’ll drill pilot holes first. Drilling pilot holes is also necessary if you have plaster walls. Check the screw heads in the keyhole bracket slots before starting. The screw head should comfortably fit around the broader portion of the keyhole, and the screw should easily slip down so that the head sits behind the keyhole’s narrow throat. Our project calls for two 3/8-inch-long and 6-32 pin, which perfectly fits the shelf’s keyhole brackets. You might discover that a different size is more appropriate for your shelf unit. Step 7: Install the Anchors on the Wall Take note of the two mounting holes you pinmarked in the previous stages; you’ll need to drill a pilot hole in the wall. Choose the right drill bit for the wall anchor you’re going to use. The matching bit size for the 6-32 wall anchor is 9/32 inches. Drill a hole in each of the two wall anchor positions outlined on the wall with a clean and accurate placement. It’s critical to precisely center the drill hole on the points you marked. Place an anchor in each hole and gently tap the pointed prongs of each anchor into the wall surface with a hammer. When the screw is tightened, these prongs prevent the anchor from spinning. Enable the stretched metal frame behind the wall surface to push and pull up close against the back of the wall by ultimately tightening the
8 Ways To Dry Out and Repair Water Damaged Kitchen Cabinets
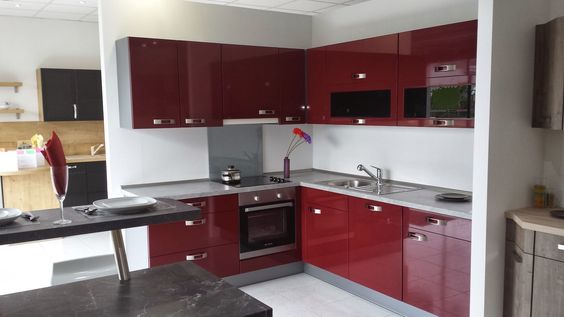
Kitchen cabinets may become soggy as a result of a flood or leak. Cabinets made of particle board are particularly vulnerable to water damage. They can swell, break, or even fall apart if they contact even a slight amount of water. Water, on the other hand, can rot MDF and solid wood cabinets. The trick to repairing water-damaged cabinets is to get rid of the water as soon as possible. Our instructions will show you how to patch water-damaged kitchen cabinets. If your kitchen cabinets have been damaged by water, take the steps below to dry and restore them. Take everything out of the cabinets. It would help if you first emptied the cabinets. Food should be packed in glass or plastic tubes, so something in a package or bag can be thrown out. Towels and other materials should be washed, and paper products should be discarded. Drain the Water The next step is to get rid of as much water as possible. Otherwise, it will keep soaking into your cabinets, causing further harm. To drain the sweat, use thick towels or blankets. And, using towels or rags, rinse the kitchen cabinets. Your cabinets should be dry to the touch at this stage. Take out the cabinet doors It’s also a good idea to take down the gate. This will not only speed up the drying process but will also limit the damage. Because of the weight of the gate, the particleboard can sag or crumble. Move the doors to a nearby space and dry them with high-volume fans. To prevent them from warping, lay them out flat. Wet and Dry Cabinets Start drying the damp kitchen cabinets now that the doors are out of the way. Usage of household fans, on the other hand, should be avoided. The particleboard would take too long to dry out. Your cabinets are more likely to break out until they dry. Instead, rent high-volume fans and structural drying dehumidifiers from a business that rents out appliances. With two or three fans and a dehumidifier, you can dry out the cabinets in an average-sized kitchen in about a day. Every four hours, check the cabinets and reposition the fans if necessary. Remember to dry behind and under the kitchen cabinets as well. Patch the Kitchen Cabinets. You will be able to patch kitchen cabinets depending on the degree of the water loss. Unless the water has delaminated portions of the cabinet, fix the damage with the carpenter’s glue and clamps. Apply carpenter’s glue between the delaminated cabinet layers, then clamp them back together. Screw 24 boards in as brackets to help straighten out bent or bloated cabinets. Screw further into the back of the door to cover the injury. Remove the braces until the cabinets and doors have been cleaned. Replacing Cabinets That Have Been Damaged Water-damaged cabinets aren’t necessarily salvageable. Chipboard cabinets are more likely than solid wood cabinets to come apart because water weakens the glue. No quantity of glue will save them until they begin to crumble. The only way to fix this is to take out the broken cabinets and replace them with new ones. If you can’t find matching cabinets, you’ll have to paint or veneer them to make them fit. Stains from Clear Water And if you save your flood-damaged cabinets, water stains are almost certain to remain. Oxalic acid is the most effective way to get rid of water stains on wood. You’ll have to sand the polish off first, unfortunately. Follow the instructions on the bottle when mixing oxalic acid with water. Then add the solution to your painted cabinets with a brush and wait for it to dry. For minor stains, one coat can suffice, but at least two are needed. You must neutralize the acid until the stain is removed. Mix half a cup of baking soda with a gallon of water and scrub the cabinets. The cabinets could then be rinsed and dried thoroughly. Deodorize and disinfect the area Even if your cabinets are completely dry, odors and mold will form over time. Wipe off the cabinets with a one-cup-per-gallon-of-water bleach solution. Mold and bacteria will be killed, and odors will be eliminated. Opening the windows will also help you get rid of odors. Sprinkle baking soda on scents at night and vacuum it up the next day. You may have to do this a couple of times before the baking soda absorbs any odors. Cabinets should be refinished at least once every few years. Water damage to kitchen cabinets can necessitate refinishing in some cases. To clear the original finish, lightly sand the wood. Then wipe down the wood with a damp rag to remove dust and dirt before allowing it to dry naturally. Apply a sealant to the wood to secure it, provide a foundation for the paint, and then stain it evenly. To ensure the wood, apply a finish coat or topcoat to obey the manufacturer’s directions. Why does water damage Kitchen Cabinets? Water is an excellent solvent that can degrade or even kill almost everything. However, the way kitchen cabinets are designed is an essential aspect in preventing water harm. Almost all kitchen cabinets use particleboard. This is a broad category of processed wood products made by gluing together small pieces of wood. Often, a veneer is applied to the exterior of the particle board to give it a more sturdy appearance. When participle board cabinets get damp, two unfortunate situations occur. The wood initially collects the water and swells. Second, the water begins to melt the cabinet’s glue. The cabinet would disintegrate faster as the wood contains more water. As a result, it’s essential to drain the water as soon as possible and begin drying your cabinets. You can hire a repair firm if you don’t have the time or equipment to do it yourself.
12 Factors to Consider for Outdoor Furniture Materials
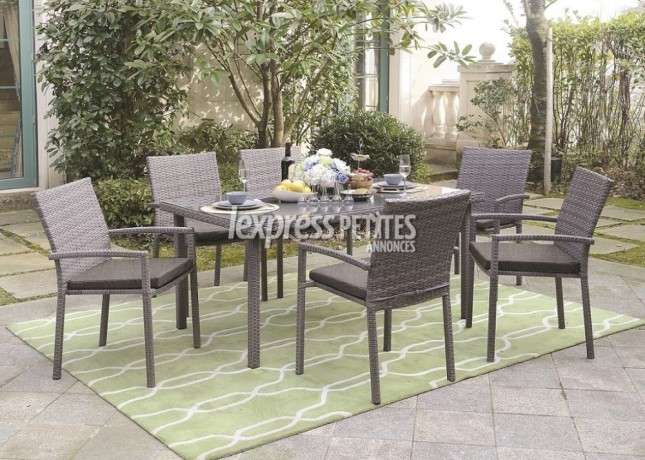
The benefits and limitations of diverse material choices are crucial to consider. They determine how best you align your desires and interests to the needs of your residential or commercial community. The choice of the “right” outdoor furniture material depends on the particular qualities of each substance being matched to your specific needs, as all situations are special. The structural stability and look of the outdoor furniture frames, tablets, and tapestries have to be retained for several years and under various weather conditions. Additionally, relevant issues to be examined are the time and resources required to keep products all year long and their “greenness” and prices. Here are factors to consider for outdoor furniture materials Rain and humidity You want to make sure that your furniture is immune to harm from some water-based issues if you live in an environment with repeated rainstorms or high humidity. Not only can standing water or moisture weaken the substance chemically, but it can also lead to health hazards. Mold and Mildew Humid environments establish an ecosystem in which different fungi flourish. The organic substances that preserve water can cause breathing problems, discomfort, or other health problems and are prone to mold and mildew. But usually, the material is not damaged and can be wiped off. Rot, on the other hand, causes the substance to biodegrade and decompose (decay). Corrosion and Rust When exposed to continuous water and oxygen, metals that include iron or steel are susceptible to corrosion. The corrosive oxidative mechanism and decay weaken these metals, and other discolorations are observed. Air and water salt intensify the chemical process, and thus rusting in coastal regions is much more common. Hitch-up The materials which allow water to penetrate will dry uniformly, causing the original form to twist or bow. At first, it may be imperceptible, but with time the material, joints, and loosening of the tubing and other fixtures will be distorted. The furniture can be held together in a distorted way. Temperature & Sun You will have to search for exterior fabrics that will stand up to intense UV rays and extremes from excessive heat to cold, whether you live in a sunny location or one that has seasonal climatic changes. Consolidated exposure to the sun can lead to the loss of luster over time and many materials. The changes in esthetics (e.g., patina) can be attractive or merely diminishing color or irregular spotting. Rupture When heated or cooled, some materials significantly expand and contract. When exposed to high temperatures or dramatic fluctuations, they can break, detach, warp, or brittle. Dry air will even bend and damage furniture. Retaining heat Further logistical issues may arise from the sun. The patio furniture left in the sun can be heated up and made unhealthy (or uncomfortable) to touch. When they sit in or want to repose a lounge chair, nobody wants to burn their skin. Wind If your outdoor furniture is in an open, windy environment, it mustn’t be blowing over or blowing off. When it’s difficult for Mother Nature, you don’t need anything to ruin a lovely light deck chair or a dining table, but it’s best to be careful than sorry. If they are not in service, you will need to keep or lock your things constantly. Longevity Any outside content will last in perfect environments for several years but will need to be replaced in unfavorable weather every few seasons. Others can survive countless elements and still look fresh for a lifetime. Another long-lasting variable is consumption. If you eat a few times in the summer at your dining table, it is less worried than sun loungers and day beds lined up by the swimming pools of famous resorts and hotels. The more often the components are used, the longer the durability. Difficulty in cleaning & care The way you care about your patio furniture also influences the esthetic and physical endurance. Season after season, certain fabrics need little care and are fast and easy to clean with easy soap and water. Others need longer-lasting maintenance and unique products to maintain their appearance and functionality. You may want to choose lower maintenance equipment if your time is at a premium. Environmentally friendly Today, everybody knows the environmental effects of manufacturing practices and raw materials entering goods while they don’t know the details. Most people (hopefully) are ecologically conscientious, and all aspects are equal. Luckily, most luxury outdoor furniture brands embraced “green,” which uses biodegradable, recyclable, or approved fabrics from organisms such as Forest Stewardship Councils (FSC). That said, the renewability of various outdoor materials varies. Cost Many of us examine the financial consequences of using one material for furniture over another. It is also necessary to consider how expensive products can be used and their worth versus advantages. You must stick within your budget. Would it have to be substituted often? Does maintenance require an excessive amount of time and effort? There are significant cost factors you do not care about in assessing options immediately.
8 Phase To Build Bathroom Wooden Shelve
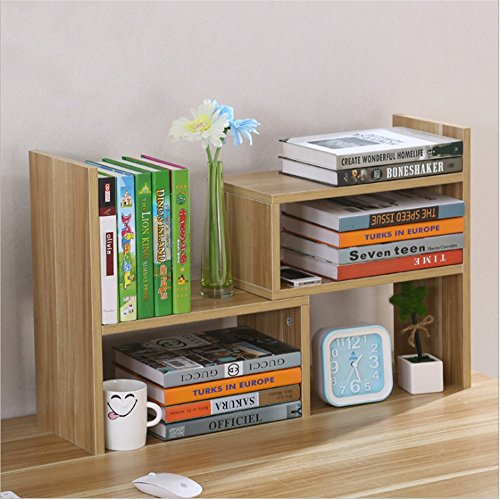
With all of its towels, soap tubes, grooming products, and other toiletries, the bathroom can be a nightmare to keep organized—and when you share the closet, there’s twice as much to store! Build an open storage wooden shelve structure to keep anything within easy reach while remaining clutter-free. Boxy wall shelves are a good choice since they have two ledges per device in case supplies tend to leak. What’s even better? It’s not difficult to put together. Follow the instructions below and have yours set up a nice bathroom wooden shelve as soon as possible. MATERIALS AND TOOLS – 1×6 lumber, 8footlong (4) – Wood glue – Clamps – Drill – 1½inch screws (36) – Sandpaper – Wood stain – Varnish – Brush – Level – Pencil – 2½inch metal brackets (6) – ½inch screws (24) – 4inchwide tins (optional) Phase 1: These 6-inch-deep cabinets’ measurements are generally applicable, so you can reduce the length if required. Cut your lumber into the following: six pieces of 4 feet each, and six more 9 inches each. (If you don’t want to handle a saw, visit a home improvement store where you pick up the woods.) Place a 9-inch perpendicular section at either end of a 4-foot long plank, then glue them together. Phase 2: Glue the uncovered edges of every 9-inch plank, then position a 4-foot board over the top. Maintain strain on the box’s fused joints until the glue has dried. To make two more boxes, repeat Steps 1 and 2. Phase 3: Glue will not be sturdy enough to withstand the weight of all the things you’ll be storing on your shelf, such as guest towels, toilet paper rolls, extra shampoo bottles, and so on. Once the glue has dried, stabilize the shelves by screwing three 12-inch screws onto both ends of each 4-foot cut. To keep the wood from splitting, pre-drill small holes and then install screws. Phase 4: To eliminate splinters, sand all of the new boxy shelves, particularly along the edges. Start with coarse 100-grit sandpaper and work your way up to a more acceptable 150-grit paper to smooth the paint. Phase 5: Apply a wood stain to your designed racks. Seal with an acrylic varnish until one or two coats have dried. If you choose, you can paint the shelves to match the color of the bathroom walls—make sure to pick a water-resistant satin or semi-gloss finish since the bathroom would most certainly be wet after a steamy shower. Phase 6: Now it’s time to put the new wall shelves up! Determine where you want the set to go, how far off the floor it should be, and how far apart it should be. (Our lowest shelf is 30 inches off the deck, and each floor has 4 inches between them.) Hold the first shelf in place and use a level to ensure that it is fully horizontal. On the wall, make a mark on the inside of the two top corners. Once you’ve placed the shelf, use 12-inch screws to secure a 2-12-inch bracket to the wall at each mark. Each corner of the box would need one bracket. Phase 7: Raise the box shelf until the top of the shelf rests on the brackets. Pre-drill the holes in the wooden shelf for the brackets and lock them with screws. Phase 8: When it’s time to hang the second shelf, try this trick: place three emptied tins across the bottom shelf that is the same size as your desired distance between shelves (ours are each 4 inches wide), then rest the next shelf atop them. Your hands will be free thanks to these helpers. To ensure that the second shelf is horizontal and consistent with the one under, place a level on the entire rack. Remove the second shelf, mark the inside top corners, and screw the brackets into the wall at these locations. Screw the shelf into place by hanging it over the stands. Conclusively, repeat this process to hang the third shelf at the top, and you’re ready to fill the 6-inch-deep ledges with all of the toiletries you can no longer fit beneath your sink.
4 Ways How To Maintain Outdoor Teak Furniture
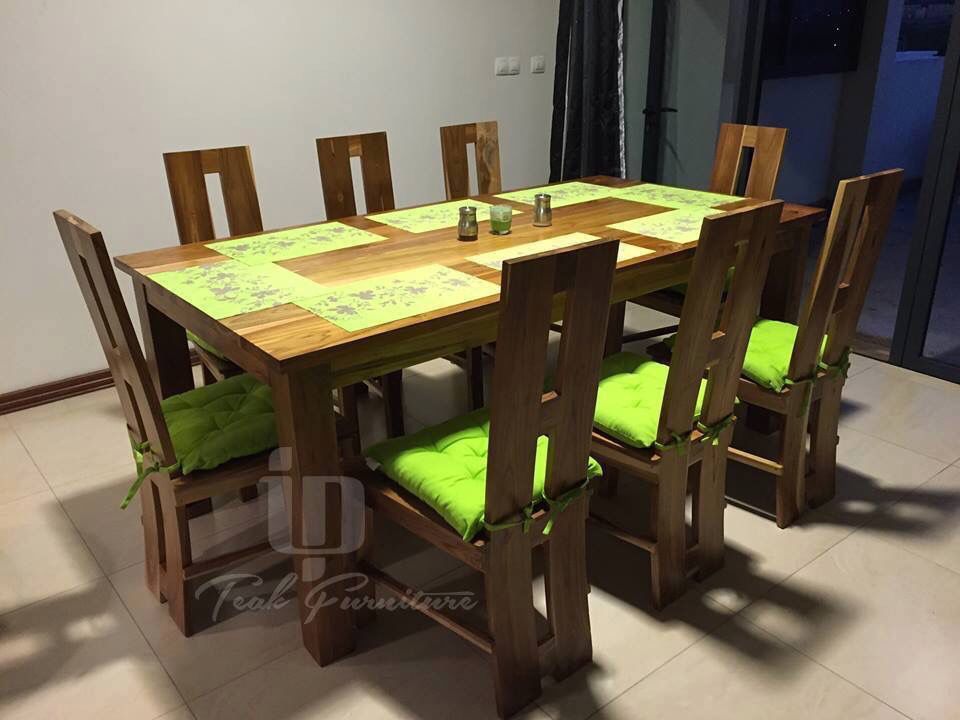
You can certainly see that the natural materials are top of the line if you ask yourself what the new trends in outdoor furniture are. In many luxury homes, mainly teak appears. Teak is the ideal material to make luxurious furnishings combined to create a functional and stunning outdoor environment. There is a range of teak furniture designed to last and environmentally sustainable. What is Teak? Teak is not only a solid and robust hardwood but contains oil and a high content of wax. Teak is exclusive to other forests. It is the perfect material for outdoor furniture because teak oil makes it waterproof and unwanted for insects that eat wood. This means that it will stay in the rain, wind, or sun outside. The investment is worthwhile because it is not just another eyecatcher to your outdoor kit; it lasts long with suitable attention. Teak Treatment You might wonder how convenient and simple it is to keep teak in top shape. Slightly sleek, but teak is incredibly easy to look after, and you can decide how much care you want to place in these items. It is also essential for you to maintain teaks. With less upkeep (only cleaning once each time), the wood takes on a worthy silver-gray patina while not compromising the wood’s structural integrity. This old patina look is a style that takes nothing to achieve with teak. Anyone who wants the teaks to be golden honey should obey some basic guidelines for treatment. Teak needs very little to no upkeep to make the patina appearance, only an annual cleaning to maintain it in good shape. A dish soap and water solution should be used, with grain scrubbing for optimal efficiency. Teak cleaners that clean and clarify the wood are often specially formulated. These may also be used for yearly washing. This can be completed until the open season and has to be dusted sometimes to keep it tidy. Teak Stainless Vs. Teak Oil Teak Oil It is not advisable to use teak oil as teak naturally contains its oil. Teak oil is an oil and solvent mixture that is different from the natural oil produced by teak. Applied to teak, it gives it a beautiful glow, but after a few months, it will diminish. Teak oil depletes the teaks of natural oil and relies on continuous external oil application. This also provides the proper moisture and fungal atmosphere to construct. A teak dressing agent is preferred for teak oil since it retains the teak’s natural hues and does not increase humidity. It must also be used only once a year to make it a little maintenance choice. Teak Sealant Use An annual procedure is advised to maintain the natural color of the teaks. Check the meal with dish soap and a soft-bristle brush, wash the teak thoroughly with the grain. Allow two weeks in the sun to dry up before you move to the next level. Spray the sealant into the wood with a lintless fabric with a teak sealant. Notice that Teak Sealant preserves the color the teak has when applying the glue. If the teak is colored with profound honey, the teak doesn’t age to the patina appearance. But after the teak is old, you can use the sealer to maintain the perfect antiquated look. Stains Removal Most teak stains can fit with a formulated cleaner like the Harbor Teak Cleaner or just some unscented soap and water. Light sanding may be essential for deeper colors, such as watermarks, wine, and coffee. It is also possible, to begin with, rougher sandpaper and uses fine-grain sandpaper to make the finish smooth. Winter’s Teak Care While teak can be left outside during the year, it’s a good idea to carry indoor furniture or keep covers for teaks throughout the months of winter to maintain them clean and ensure that they remain fine. Ensuring there are no water pools on or under your furnishings is a smart thing for your furniture to last longer. Why did teak in an outdoor furniture environment become a necessity? The complexity it brings to an exterior design, or how teak adds a touch of elegance to practicality and perseverance, could fascinate us for this natural material. It enables us to enjoy something magnificent, and we know the investment is worth it. Teak outdoor furniture with the proper attention will last long (which is very minimal). That is why many other kinds of wood are chosen. Teak not only makes furnishings perfect but takes a lifetime as well.