 Skip to content
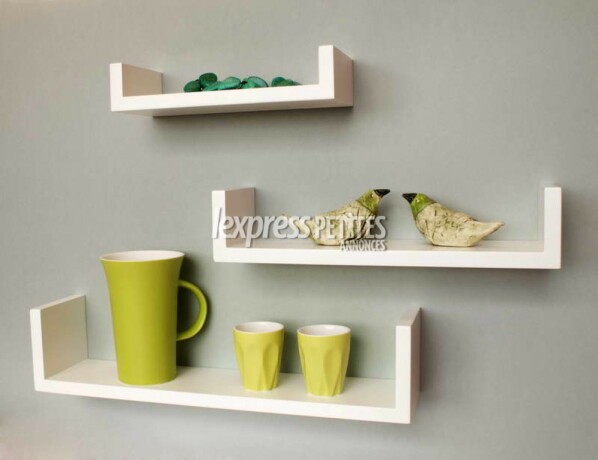
Rather than filling empty wall space with uninteresting artwork, several wall shelf units are available that are both decorative and functional. The combination of a shelf, coat rack, and photo frame is an example of one thing to give you an exciting wall space. The most challenging aspect of hanging such a shelving device is precisely positioning the hanger screws. Most commercial shelving systems have pre-installed hanger brackets on the back of the door, but some model uses keyhole brackets. These are made so the support screw can slip the shelving device, push into the wall, and then be locked in place by allowing the shelf to fall back over the heads of the screws. The shelving machine would not work correctly unless the wall screws are perfectly fitted.
Since wooden shelving units can be hefty, particularly if they’re wide and long, they must be well-supported. Driving support screws directly into wall studs is the most reliable process. The studs are usually spaced 16 inches apart in the middle of most framing projects. If the hanger brackets on your shelving device are spaced 16, 32, or 48 inches apart, you will be able to insert the support screws directly through the studs.
However, this would not be necessary for some instances, and you will instead need to install the support screws in the stud cavities. The steps below illustrate ways to hang a decorative wall shelf using a wall anchor.
Step 1: Select a Shelf Location
To begin, you’ll need to hang the shelf on the wall. The shelf and coat hooks on a device like the one we’re building should be at a height that’s easy to access. Image frames are usually placed at or above eye level. If you eyeball the shelf’s spot, enlist the assistance of a friend to keep it against the wall. To guarantee that the shelf is perfectly square, use a carpenter’s level. When you’re happy with the placement, gently trace the top and sides of the shelf unit on the wall with a pencil.
Step 2: Make a Line of Reference
Measure the gap between the end of the shelf and the top of the porthole opening on the hanger bracket by turning the shelving unit back-side up. This distance can be approximately 2 inches. Measure down from the shelf outline and designate a point on the wall that corresponds to this size. Create a second horizontal line segment through the wall from this point with a carpenter’s level. This line should extend parallel to the shelf outline and around the shelf from one side outline to another. This will serve as a guideline for drilling and installing wall anchors and support screws.
Step 3: Measure and mark the wall.
The First Wall Anchor Location is measured and marked. Measure the distance between the hanger bracket keyhole slots and the side of the shelving unit on the back of the shelf. Measure to the middle of the space with great accuracy. This distance can be approximately 1 7/8 inches in our case. Measure in from the side and outline a distance precisely equal to this measurement, then make a note on the wall anchor reference line you just traced on the wall. The first wall anchor can be placed precisely there. The shelf back has a keyhole hanger and should be perfectly aligned with it.
Step 4: Getting up to drill a hole in the wall
Ensure you measure the distance between hanger brackets. Also, make sure that the anchor for the second hanger bracket is perfectly spaced with the first anchor in this process, which is perhaps the most important.
Take an accurate measurement from the middle of each keyhole slot on the back of the shelving device between the hanger brackets. This can be approximately 23 3/16 inches.
Step 5: Shelf mounting hole measurement
Make a note of the position of the second wall anchor. Measure from the first wall anchor position to the second wall anchor location on the comparison side, making sure the distance between the marks precisely suits the measurement you just made between the keyhole brackets on the shelf unit.
Step 6: Creating a mounting hole in a wall
Ensure that the wall anchor is in good working order by putting it through its paces. An expandable metal hollow-wall anchor, widely known as a Molly bolt, is the best choice for this use. Some hollow-wall anchors have sharp tips that can quickly be hammered through drywall, but to prevent wall damage, we’ll drill pilot holes first. Drilling pilot holes is also necessary if you have plaster walls. Check the screw heads in the keyhole bracket slots before starting. The screw head should comfortably fit around the broader portion of the keyhole, and the screw should easily slip down so that the head sits behind the keyhole’s narrow throat. Our project calls for two 3/8-inch-long and 6-32 pin, which perfectly fits the shelf’s keyhole brackets. You might discover that a different size is more appropriate for your shelf unit.
Step 7: Install the Anchors on the Wall
Take note of the two mounting holes you pinmarked in the previous stages; you’ll need to drill a pilot hole in the wall. Choose the right drill bit for the wall anchor you’re going to use. The matching bit size for the 6-32 wall anchor is 9/32 inches. Drill a hole in each of the two wall anchor positions outlined on the wall with a clean and accurate placement. It’s critical to precisely center the drill hole on the points you marked. Place an anchor in each hole and gently tap the pointed prongs of each anchor into the wall surface with a hammer. When the screw is tightened, these prongs prevent the anchor from spinning. Enable the stretched metal frame behind the wall surface to push and pull up close against the back of the wall by ultimately tightening the anchor screw back out each screw, so the heads extend 1/8 inch to 1/4 inch after it is completely secured. The screw heads would fit into their keyhole slots in the hanger brackets as a result. Clean out the drywall dust left behind from the drilling and remove any chalk traces on the wall.
Step 8: Place the Shelf on the Wall
All that’s left is to carefully align the wall shelf keyhole brackets over each hanger screw and slip the shelf down so that the brackets fit snugly over the heads of the screws until the wall anchors are in place. If you’re having trouble getting the brackets to work over the screw heads, try extending the screws farther away from the wall.
Your wall shelf is now complete and ready to use.
